The Honeywell T6 Pro is a Wi-Fi programmable thermostat with a color touchscreen display, offering voice control and smart home integration. Designed for energy efficiency and ease of use, it provides advanced scheduling and adaptive recovery features.
1.1 Overview of the T6 Pro Thermostat
The Honeywell T6 Pro is a Wi-Fi programmable thermostat designed for smart home integration and energy efficiency. It features a color touchscreen display and compatibility with various HVAC systems, including heat pumps and conventional systems. The thermostat supports up to 3 heat and 2 cool stages for heat pumps and 2 heat and 2 cool stages for conventional systems. It also measures and displays indoor humidity levels. The T6 Pro is part of Honeywell’s professional lineup, requiring installation by an authorized reseller. Its design emphasizes ease of use, with programmable schedules and adaptive recovery features to optimize comfort and energy savings.
1.2 Key Features of the T6 Pro Thermostat
The Honeywell T6 Pro offers adaptive intelligent recovery, learning your system’s needs to reach desired temperatures on time. It supports geofencing and smart home integration via Wi-Fi. The thermostat features a color touchscreen and voice control compatibility. It includes four programmable periods daily and temporary overrides. Energy-saving features like humidity monitoring and air filter reminders enhance efficiency. With a 5-year limited warranty, the T6 Pro ensures reliability. Its compatibility with multiple HVAC systems and stages makes it versatile for various home setups, while the Z-Wave Plus certification ensures seamless integration with smart home systems.

Installation of the T6 Pro Thermostat
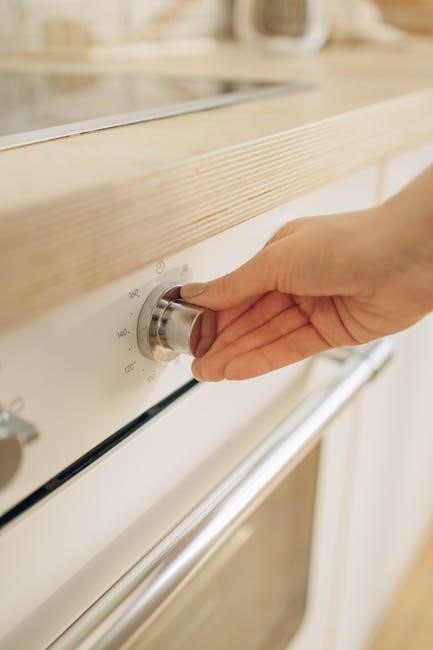
The T6 Pro Thermostat comes with a UWP mounting system and decorative cover plate. Installation requires a C wire or battery power. Mount the thermostat, connect wires, and follow on-screen prompts to complete setup. Professional installation is recommended for systems without a C wire.
2.1 Package Contents and Requirements
The T6 Pro Thermostat package includes the thermostat unit, UWP mounting system, decorative cover plate, screws, anchors, 2 AA batteries, and thermostat literature. Ensure your HVAC system supports up to 2 heat/2 cool stages for conventional systems or 2 heat/1 cool for heat pumps. A C wire is recommended for continuous power, though battery operation is possible. Check compatibility with your system’s voltage and wiring configuration before installation. Professional installation is advised for complex systems or if unsure about wiring requirements. Make sure all components are included and undamaged before proceeding. Read the manual thoroughly for specific instructions.
2.2 Step-by-Step Installation Process
Turn off power to your HVAC system at the circuit breaker. 2. Remove the old thermostat and label the wires. 3. Install the UWP mounting system on the wall. 4. Connect the labeled wires to the appropriate terminals on the new thermostat. 5. Attach the T6 Pro Thermostat to the mounting system. 6. Turn the power back on and follow the on-screen setup instructions to configure settings like Wi-Fi and system type. If unsure, consult the manual or contact a professional for assistance. Ensure all connections are secure for proper functionality.

Thermostat Controls and Navigation
The T6 Pro features an intuitive touchscreen interface and navigation buttons for easy operation. The screen lights up when powered by a C wire, staying on for 45 seconds after adjustments. If battery-powered, the screen remains lit for 8 seconds. Use the buttons to cycle through modes, access menus, and adjust settings seamlessly. This user-friendly design ensures effortless control over your home’s temperature and smart features.
3.1 Understanding the Thermostat Interface
The Honeywell T6 Pro thermostat features a touchscreen display with a user-friendly interface. The home screen displays current temperature, setpoint, and system status. It includes a locked screen to prevent accidental changes, with a center button to unlock. The interface provides clear indicators for HVAC operation and alerts. Menus are accessed via touch, offering options like scheduling, system settings, and energy reports. The screen lights up when powered by a C wire, staying on for 45 seconds after changes, while battery-only mode limits screen time to 8 seconds. This design ensures an intuitive and energy-efficient user experience.
3.2 Navigating the Menu and Settings
Navigating the T6 Pro thermostat menu is straightforward. Press the center button to unlock the screen and access settings. The menu includes options for scheduling, system modes, and energy reports. Use the touchscreen to cycle through settings like heat, cool, or off modes. Adaptive recovery and fan operation can also be adjusted. Alerts for filter replacements or low batteries appear on the home screen. The menu is intuitive, with clear labels and touch-activated options. This design ensures easy access to all features, making it simple to customize your heating and cooling preferences efficiently. The interface is user-friendly, promoting seamless control over your HVAC system.

Programming the T6 Pro Thermostat
The T6 Pro allows users to set up to four daily time periods with different settings for weekdays and weekends, optimizing energy usage and comfort through programming schedules and Adaptive Intelligent Recovery.
4.1 Setting Up Daily Schedules
The T6 Pro allows users to program four time periods daily, with distinct settings for weekdays and weekends. The default schedule is designed to reduce energy costs while maintaining comfort. To set up, press Menu, select Schedule, and choose the desired day type. Adjust the wake, leave, return, and sleep times using the arrow buttons. Set temperatures for heating and cooling by pressing the temperature adjustment buttons. Temporary overrides can be made by pressing the temperature buttons and holding until the desired setpoint is reached. The thermostat will revert to the schedule automatically, ensuring energy efficiency and personalized comfort.
4.2 Temporary Overrides and Adjustments
Temporary overrides on the T6 Pro thermostat allow users to adjust the temperature without altering the programmed schedule. To override, simply press the temperature adjustment buttons until the desired setpoint is reached. The thermostat will maintain this temperature until the next scheduled period begins. For immediate adjustments, press and hold the buttons to bypass the current setting. Temporary overrides are ideal for unexpected changes in occupancy or comfort needs. The thermostat will automatically revert to the programmed schedule, ensuring energy efficiency and convenience. This feature provides flexibility without disrupting the overall energy-saving routine.
Smart Features and Wi-Fi Connectivity
The T6 Pro offers seamless Wi-Fi connectivity for remote control via the Honeywell Home app. It supports Z-Wave Plus integration and works with voice assistants like Amazon Alexa for smart home automation.
5.1 Connecting to Wi-Fi
To connect your Honeywell T6 Pro Thermostat to Wi-Fi, download the Honeywell Home app and create an account. Select the T6 Pro model during setup. The app will guide you to access the thermostat’s Wi-Fi settings. Ensure your thermostat is in Wi-Fi setup mode by checking the screen. Connect to the thermostat’s network from your device’s Wi-Fi settings, then return to the app to complete the connection by selecting your home network and entering the password. Once connected, the thermostat will confirm the connection, and you can control it remotely through the app.
5.2 Smart Home Integration
The Honeywell T6 Pro Thermostat seamlessly integrates with smart home systems like Amazon Alexa and Google Assistant, enabling voice control for temperature adjustments. Use the Honeywell Home app to synchronize your thermostat with other smart devices, creating a unified smart home experience. The thermostat also supports Z-Wave Plus certification, allowing it to connect with compatible hubs and devices. This integration enhances convenience, allowing you to manage your home’s climate effortlessly from a single interface, whether you’re at home or away. Smart home integration ensures your T6 Pro works cohesively within your existing smart ecosystem for optimal comfort and efficiency.

Energy-Saving Features
The T6 Pro Thermostat features Adaptive Intelligent Recovery, which optimizes heating and cooling cycles to reduce energy use while maintaining comfort. Smart scheduling and energy reports help lower utility bills.
6.1 Adaptive Intelligent Recovery
The Honeywell T6 Pro Thermostat features Adaptive Intelligent Recovery, a smart technology that learns your system’s behavior over time. It calculates how long your HVAC system needs to reach the desired temperature and adjusts operation accordingly. This feature ensures your home is comfortable at your scheduled times while minimizing energy waste. By pre-cooling or pre-heating, it optimizes performance and efficiency, especially during temperature transitions. This intelligent recovery system works seamlessly with programmable schedules, offering both convenience and energy savings without compromising comfort.
6.2 Energy Efficiency Tips
Maximize energy savings with the Honeywell T6 Pro by following these tips. Set consistent temperatures, avoiding frequent adjustments, and use programmable schedules to align with your daily routine. Lower the temperature by 1-2 degrees in winter and raise it in summer for significant energy savings. Utilize the thermostat’s smart features, such as geofencing and smart recovery, to optimize heating and cooling when you’re away or asleep. Regularly update your schedule and adjust settings based on seasonal changes to maintain efficiency. These practices help reduce energy consumption while keeping your home comfortable year-round.

Maintenance and Troubleshooting
Regularly maintain your T6 Pro by replacing batteries and cleaning the display. Troubleshoot common issues like blank screens or connection problems by checking power sources and settings. Resetting the thermostat can resolve many glitches, ensuring optimal performance and energy efficiency. Refer to the manual for detailed solutions and guidelines to keep your system running smoothly. Always follow safety precautions and manufacturer recommendations for repairs and maintenance. Proper upkeep extends the lifespan of your thermostat and ensures consistent heating and cooling performance. Address issues promptly to avoid potential system downtime and maintain your home’s comfort. For persistent problems, contact Honeywell support or a certified technician for professional assistance and warranty-related inquiries. Use genuine Honeywell replacement parts for any repairs to guarantee compatibility and functionality. Schedule annual professional check-ups for your HVAC system to complement thermostat maintenance and ensure overall system efficiency. Keep user manuals and guides handy for quick reference during troubleshooting or maintenance tasks. By adhering to these practices, you can ensure your T6 Pro operates efficiently and effectively for years to come.
7.1 Replacing Batteries
To replace the batteries in your Honeywell T6 Pro thermostat, carefully pull the device from its wall mount. Remove the old AA batteries and insert new ones, ensuring proper orientation. Reattach the thermostat to the wall mount and check for normal operation. The thermostat may require a few seconds to restart. If the display remains blank, ensure the batteries are correctly installed. Refer to the owner’s manual for detailed instructions. Always use high-quality batteries to maintain performance. Dispose of old batteries responsibly. If issues persist, contact Honeywell support for assistance. Regular battery replacement ensures uninterrupted thermostat functionality and optimal energy management.
7.2 Common Issues and Solutions
Common issues with the Honeywell T6 Pro thermostat include a blank display, which may indicate a power issue or low batteries. Ensure the circuit breaker is on and batteries are correctly installed. If the display shows an exclamation mark in a triangle, it signals a system error; refer to the manual or contact support. If the thermostat doesn’t return to default settings after an override, check your schedule settings. For Wi-Fi connectivity problems, restart your router and ensure the thermostat is connected to the correct network. If issues persist, perform a hard reset by removing batteries for 30 seconds. Always refer to the troubleshooting guide for detailed solutions.

Advanced Settings and Configuration
The T6 Pro offers advanced settings like system operation modes (heat pump/conventional) and installer setup options. It includes features like adaptive recovery and customizable stage control for precise system operation.
8;1 System Operation Modes
The T6 Pro supports multiple system operation modes, including heat pump and conventional systems. It can handle up to 3 heat/2 cool stages for heat pumps and 2 heat/2 cool stages for conventional systems. Additionally, it is compatible with dual-fuel heat pump systems, providing flexibility for various HVAC setups. The thermostat also monitors and displays indoor relative humidity, enhancing comfort control. Users can switch between modes via the menu, ensuring optimal performance for their specific system. This adaptability makes the T6 Pro suitable for a wide range of heating and cooling configurations, offering precise temperature management.
8.2 Installer Setup and ISU Options
The T6 Pro offers advanced Installer Setup (ISU) options for professional configuration. These settings allow installers to customize system parameters, such as compressor protection and staging options, ensuring compatibility with various HVAC systems. The ISU menu provides detailed controls for system type selection, including heat pump, conventional, and dual-fuel configurations. Installers can also set humidity control parameters and enable or disable specific features based on the system requirements. These options ensure optimal performance and efficiency, making the T6 Pro adaptable to a wide range of installations. The ISU is accessed via the thermostat’s menu, requiring professional expertise for precise setup.

Warranty and Support
The T6 Pro is backed by a 5-year limited warranty, covering defects in materials and workmanship. For assistance, contact Honeywell Support at 1-800-468-1502 or visit honeywellhome.com/support.
9.1 5-Year Limited Warranty Details
The Honeywell T6 Pro Thermostat comes with a comprehensive 5-year limited warranty, ensuring coverage for defects in materials and workmanship. This warranty period begins from the date of purchase and applies to the original purchaser. It covers repairs or replacements of defective parts, excluding damage caused by improper installation or misuse. Additionally, the warranty remains valid if the thermostat is installed by an authorized professional. For full details, visit the Honeywell Home website or contact their customer support team. This warranty underscores Honeywell’s commitment to product quality and customer satisfaction.
9.2 Contacting Honeywell Support
For assistance with the T6 Pro Thermostat, Honeywell provides multiple support channels. Visit their official website at www.honeywellhome.com/support for troubleshooting guides, manuals, and FAQs. You can also contact their dedicated customer service team via phone at 1-800-468-1502 for personalized help. Additionally, Honeywell offers online chat support for quick inquiries. Ensure to have your product model number and purchase details ready for efficient service. Honeywell’s support team is available to address installation, operation, or warranty-related questions, ensuring a seamless experience for T6 Pro users.
Compatibility and System Requirements
The Honeywell T6 Pro is compatible with HVAC systems up to 3 heat and 2 cool stages for heat pumps and 2 heat/2 cool for conventional systems. It requires a C-wire or battery power and supports Z-Wave Plus certification for smart home integration.
10.1 Compatible HVAC Systems
The Honeywell T6 Pro is designed to work with a variety of HVAC systems, including conventional gas, oil, and electric furnaces, as well as heat pumps. It supports up to 3 heat and 2 cool stages for heat pump systems, making it suitable for dual-fuel setups. Additionally, it is compatible with 2 heat and 2 cool stage conventional systems, offering flexibility for different home configurations. This wide compatibility ensures the T6 Pro can be installed in various residential environments, providing efficient temperature control regardless of the existing HVAC setup.
10.2 Z-Wave Plus Certification
The Honeywell T6 Pro Thermostat is Z-Wave Plus certified, enabling seamless integration with smart home systems. Z-Wave Plus enhances device compatibility, range, and security compared to standard Z-Wave. It allows the thermostat to connect with other Z-Wave devices, creating a unified smart home network. Users can control the thermostat remotely via a Z-Wave hub or gateway, ensuring convenience and energy management. This certification ensures reliable communication and expanded functionality, making the T6 Pro a versatile choice for modern smart home setups.

User Manual and Documentation
The Honeywell T6 Pro thermostat manual is accessed online, offering detailed installation, programming, and troubleshooting guides. It is available in multiple languages, ensuring comprehensive support for all users.
11.1 Accessing the T6 Pro Manual Online
The Honeywell T6 Pro thermostat manual is easily accessible online through the official Honeywell Home website. It is available in multiple languages, including English, French, and Spanish, ensuring accessibility for a diverse user base. The manual is provided in PDF format, allowing users to download and print it for convenience. Additionally, the online version is searchable, making it simple to find specific topics or troubleshooting guides quickly. For detailed instructions, visit the Honeywell support page, where you can also find other resources and guides to help you get the most out of your T6 Pro thermostat.
11.2 Language Options and Translations
The Honeywell T6 Pro thermostat manual is available in multiple languages, including English, French, and Spanish, to cater to a diverse user base. The manual can be downloaded as a PDF from the official Honeywell Home website. This ensures users worldwide can access detailed instructions in their preferred language. The multilingual support enhances usability and makes the thermostat more accessible globally. The manual covers installation, programming, and troubleshooting, providing comprehensive guidance regardless of language preferences.
Comparison with Other Models
The Honeywell T6 Pro thermostat stands out for its smart home integration and Z-Wave Plus certification, offering advanced features compared to other models like the T4 Pro and T10 Pro.
12.1 T6 Pro vs. T4 Pro Thermostats
The Honeywell T6 Pro and T4 Pro thermostats differ in features and functionality. The T6 Pro offers a color touchscreen display, Wi-Fi connectivity, and smart home integration, making it more advanced. It supports geofencing and adaptive scheduling, enhancing energy efficiency. The T4 Pro, while simpler, lacks a touchscreen and relies on manual operation. It is more budget-friendly and suitable for users who prefer basic temperature control without smart features. Both models are compatible with various HVAC systems but cater to different user preferences and needs.
12.2 T6 Pro vs. T10 Pro Thermostats
The Honeywell T6 Pro and T10 Pro thermostats share similarities but differ in advanced features. The T10 Pro offers remote sensors for zoned temperature control and supports more HVAC stages, making it ideal for complex systems. It also includes geofencing for location-based temperature adjustments. The T6 Pro, while still feature-rich, lacks remote sensors and has fewer stage options. Both models support Wi-Fi connectivity and smart home integration, but the T10 Pro is more suited for advanced users needing precise temperature control. The T6 Pro remains a cost-effective option for basic smart thermostat needs.

Frequently Asked Questions
Common questions include how to reset the T6 Pro, troubleshoot issues, and understand features like adaptive intelligent recovery. Users also inquire about compatibility with HVAC systems and warranty details.
13.1 Common User Questions
Users often ask about resetting the T6 Pro, understanding error codes like the exclamation mark icon, and how to unlock the thermostat. Many inquire about compatibility with HVAC systems, while others seek clarity on warranty details and troubleshooting steps. Additionally, questions arise about smart home integration, scheduling overrides, and battery replacement. Some users also want to know how to disable override settings and resolve issues like a blank screen or Wi-Fi connectivity problems. These questions highlight common challenges and solutions for optimal thermostat performance.
13.2 Resetting the Thermostat
To reset the Honeywell T6 Pro, press and hold the menu button for 5 seconds until the screen resets. For a factory reset, press and hold the mode button while removing the thermostat from the wall mount. Reattach it to restore default settings. If issues persist, contact Honeywell support at 1-800-468-1502 for assistance. Resetting can resolve lockouts, override issues, or system malfunctions. Always refer to the manual for detailed steps to avoid configuration loss or system downtime.
The Honeywell T6 Pro Thermostat offers advanced features, energy efficiency, and user-friendly navigation, making it a reliable choice for smart home comfort. Its warranty and support options ensure lasting satisfaction.
14.1 Final Thoughts on the T6 Pro Thermostat
The Honeywell T6 Pro Thermostat is a highly efficient and user-friendly device designed for modern smart homes. Its intuitive interface, Wi-Fi connectivity, and voice control make it a standout choice for homeowners seeking convenience and comfort. With features like adaptive recovery and energy-saving modes, it optimizes heating and cooling systems while reducing energy bills. The thermostat’s compatibility with various HVAC systems and its Z-Wave Plus certification ensure seamless integration into smart home ecosystems. Overall, the T6 Pro is a reliable and feature-rich thermostat that delivers exceptional performance and value.
14.2 Recommended Next Steps
After reviewing the manual, the next steps involve exploring the thermostat’s features and customizing settings to suit your needs. Start by setting up daily schedules and connecting the thermostat to your smart home system for seamless integration. Explore energy-saving modes and adaptive recovery features to optimize your HVAC system’s performance. Regularly check and replace air filters, and ensure batteries are maintained for uninterrupted operation. Refer to the troubleshooting section if issues arise and consult the advanced settings for further customization. By following these steps, you can maximize the T6 Pro’s potential and enjoy enhanced comfort and energy efficiency in your home.