
Costco Chicken Alfredo Cooking Instructions: A Comprehensive Guide
Unlock a delightful‚ restaurant-quality meal with this detailed guide to preparing Costco’s Chicken Alfredo kit – simple steps for a satisfying dinner!
Understanding the Costco Chicken Alfredo Kit
The Costco Chicken Alfredo kit is designed for convenience‚ offering a complete meal solution for busy weeknights or when you crave a comforting Italian classic. It’s a fantastic option for families‚ providing a substantial portion size at a reasonable price point. However‚ understanding what you’re getting is key to maximizing your enjoyment.
This isn’t a fully from-scratch Alfredo; it’s a pre-made sauce and pre-portioned chicken designed to be quickly and easily prepared at home. The sauce is creamy and rich‚ but benefits from a little personalization – we’ll cover that later! The chicken is typically pre-marinated‚ offering a good flavor base‚ but requires thorough cooking to ensure safety. Knowing this allows you to adjust cooking times and seasoning to your preference‚ transforming a convenient kit into a truly delicious and customized meal.
Kit Contents & Overview
Inside each Costco Chicken Alfredo kit‚ you’ll find everything needed for a complete meal‚ serving approximately four people. The core components include a generous pouch of creamy Alfredo sauce – the star of the show! – and a package of pre-marinated‚ individually frozen chicken breast strips. You’ll also receive a package of fettuccine pasta‚ specifically chosen to pair perfectly with the rich sauce.
Occasionally‚ kits may include a small seasoning packet‚ though this is not always present. It’s wise to have your own seasonings on hand regardless. The packaging is designed for easy storage; the sauce and chicken are typically found in the freezer section‚ while the pasta is shelved. A quick inventory upon bringing the kit home ensures you have all the components before you begin‚ streamlining the cooking process and preventing mid-recipe surprises!
Nutritional Information & Serving Size
Understanding the nutritional aspects of this convenient meal is crucial for balanced eating. A single serving (approximately one-quarter of the kit) contains a significant amount of calories‚ typically ranging from 700-800‚ primarily due to the rich Alfredo sauce and pasta. Fat content is also substantial‚ often exceeding 40 grams per serving. Protein‚ sourced from the chicken‚ contributes around 30-40 grams‚ making it a reasonably protein-rich option.
Sodium levels can be quite high‚ so those monitoring their salt intake should be mindful; The kit is designed to serve four adults‚ but portion control is recommended. Consider supplementing with a side salad or steamed vegetables to balance the meal and increase nutritional value. Always refer to the specific packaging for the most accurate and up-to-date nutritional information‚ as formulations can occasionally vary.
Preparation: Getting Started
Before diving into cooking‚ ensure you have everything ready – from tools to ingredients – for a smooth and enjoyable Costco Chicken Alfredo experience!
Required Tools & Equipment
To successfully prepare your Costco Chicken Alfredo‚ gathering the right tools is crucial. You’ll need a large‚ deep skillet or pot – preferably non-stick – for cooking the chicken and combining everything. A separate saucepan is ideal for heating the Alfredo sauce‚ preventing sticking and ensuring even warming.
Pasta lovers‚ grab a large pot for boiling the fettuccine! A colander is essential for draining the cooked pasta. For precise measurements‚ have measuring cups and spoons handy. A meat thermometer is highly recommended to guarantee the chicken reaches a safe internal temperature.
Don’t forget basic kitchen necessities like a cutting board‚ a sharp knife for any added vegetables‚ stirring spoons (wooden or silicone are best to avoid scratching)‚ and tongs for handling the chicken. Finally‚ serving spoons and plates will complete your setup for a delightful meal!
Ingredient Checklist (Beyond the Kit)
While the Costco Chicken Alfredo kit is comprehensive‚ a few additions elevate the dish. First and foremost‚ you’ll need fettuccine pasta – the kit doesn’t include it! Approximately one pound is sufficient for a family of four. Freshly grated Parmesan cheese is a must-have for serving; pre-grated lacks the same flavor punch.
Consider adding a tablespoon or two of butter to enrich the sauce further. If you enjoy a touch of freshness‚ have some chopped fresh parsley on hand for garnish. For those who like a little heat‚ red pepper flakes are a fantastic addition.
Finally‚ a pinch of salt and black pepper‚ even though the sauce is pre-seasoned‚ allows for personalized flavor adjustment. Olive oil is helpful if pan-frying the chicken. These simple additions transform a convenient kit into a truly memorable meal!
Thawing the Chicken (Important!)
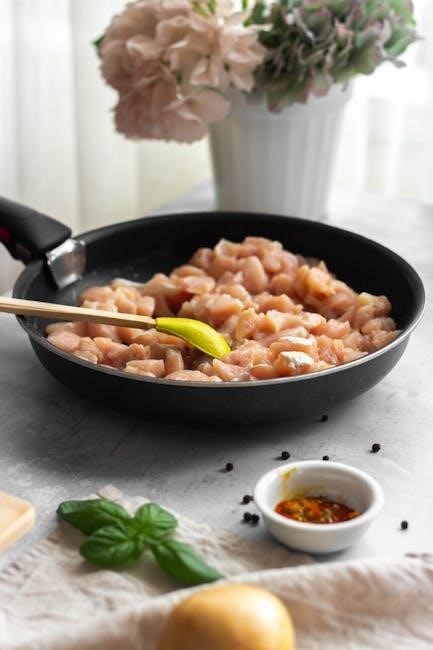
Properly thawing the chicken is crucial for even cooking and food safety. The best method is to thaw it in the refrigerator overnight. Place the frozen chicken in a leak-proof container or on a plate to prevent any juices from contaminating other foods. Allow at least 24 hours for complete thawing – larger pieces may require longer.
Avoid thawing at room temperature‚ as this encourages bacterial growth. If you’re short on time‚ you can use the cold water method: submerge the sealed chicken in cold water‚ changing the water every 30 minutes‚ until thawed.
Never refreeze chicken that has been thawed using the cold water method. Once thawed‚ the chicken is ready to be cooked according to the instructions – ensuring a safe and delicious meal!
Cooking the Alfredo Sauce
Transform the pre-made sauce into a creamy‚ flavorful delight; follow these steps to achieve the perfect Alfredo consistency and taste experience!
Sauce Base: Initial Heating
Begin by carefully emptying the Alfredo sauce packet into a large‚ deep skillet or saucepan. Avoid using a non-stick pan initially‚ as it can hinder proper sauce development and browning – stainless steel is ideal. Place the skillet over medium-low heat; patience is key here! We want a gentle warming process‚ not a rapid boil.
Stir the sauce constantly with a wooden spoon or heat-resistant spatula. This prevents sticking and ensures even heating throughout. As the sauce warms‚ you’ll notice it begins to loosen and become more fluid. Continue stirring for approximately 5-7 minutes‚ observing for any signs of scorching on the bottom of the pan. The goal is to bring the sauce to a simmer‚ where small bubbles begin to form around the edges‚ but not a vigorous boil. Maintaining a low and slow approach is crucial for a smooth‚ emulsified final product.
Achieving Creamy Consistency
Once the sauce is simmering gently‚ the real magic begins! The Costco Alfredo sauce relies on emulsification – blending the fats and liquids for a luxuriously creamy texture. Continue stirring consistently‚ and now‚ introduce a tablespoon of cold butter‚ cut into small pieces. This addition‚ surprisingly‚ aids in stabilization and richness.
As the butter melts‚ it will further emulsify with the sauce. If the sauce appears slightly broken or grainy‚ don’t panic! Vigorous stirring is your friend. A splash of pasta water (reserved from cooking the pasta – see later sections) can also work wonders‚ helping to bind the sauce together. Continue this process for another 3-5 minutes‚ until the sauce coats the back of a spoon and has a velvety smooth consistency. Avoid high heat‚ as this can cause separation.
Seasoning the Alfredo Sauce
Now that your Alfredo sauce boasts a beautiful creamy consistency‚ it’s time to elevate the flavor profile. The Costco kit provides a good base‚ but a little customization goes a long way. Begin with freshly ground black pepper – be generous! About ½ to ¾ of a teaspoon is a good starting point‚ adjusting to your preference.
Next‚ taste the sauce. It likely needs salt‚ but add it gradually‚ ¼ teaspoon at a time‚ tasting after each addition. Remember‚ the Parmesan cheese already contributes saltiness. A pinch of nutmeg‚ about ⅛ of a teaspoon‚ adds a subtle warmth and complexity that complements the richness of the Alfredo. For a brighter flavor‚ consider a squeeze of lemon juice – just a teaspoon will do. Finally‚ don’t be afraid to add a clove of minced garlic for extra depth!
Avoiding Common Sauce Issues (Lumps‚ Separation)
Achieving a smooth‚ emulsified Alfredo sauce is crucial. Lumps often occur from adding dairy too quickly or at too high a heat. Always temper your cream – slowly whisk in a small amount of the hot sauce before adding the rest. If lumps do form‚ immediately remove from heat and vigorously whisk. A brief stint with an immersion blender can also rescue it.
Separation‚ where the sauce appears greasy‚ happens when the fats break down. Low and slow is key! Avoid boiling the sauce. Constant stirring is your best friend‚ ensuring even heat distribution. If separation occurs‚ try whisking in a tablespoon of cold butter or a teaspoon of cornstarch slurry (cornstarch mixed with cold water) to re-emulsify. Patience and gentle heat are vital for Alfredo success!

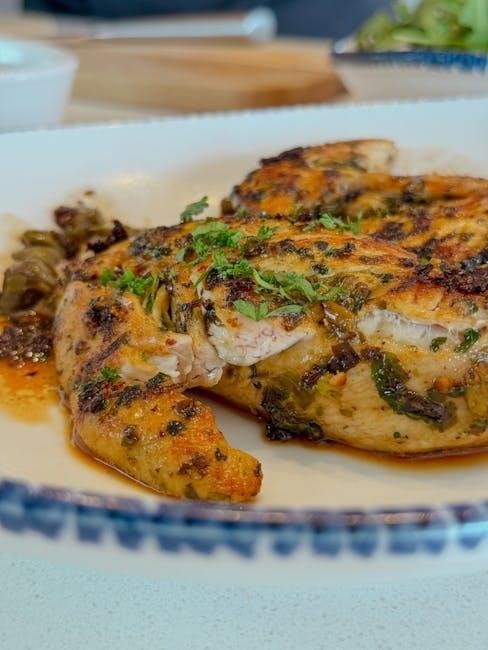
Cooking the Chicken
Perfectly cooked chicken elevates this dish! We’ll explore both pan-frying for speed and oven baking for even cooking‚ ensuring tenderness and flavor.
Pan-Frying the Chicken
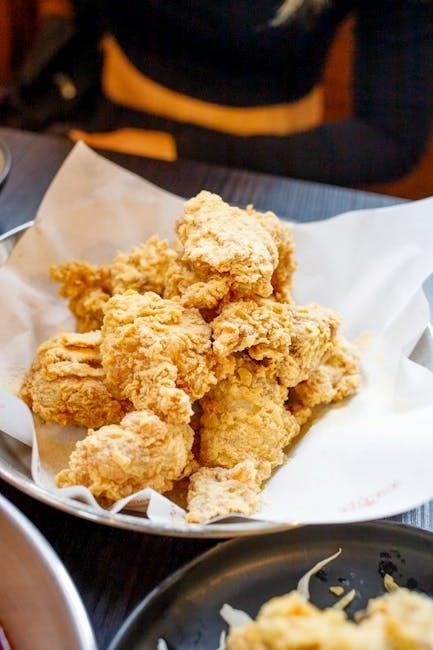
For a quick and flavorful chicken preparation‚ pan-frying is an excellent choice; Begin by patting the thawed chicken pieces completely dry with paper towels – this is crucial for achieving a good sear. Heat approximately 1-2 tablespoons of olive oil or butter (or a combination!) in a large skillet over medium-high heat.
Once the oil is shimmering‚ carefully add the chicken to the hot skillet‚ ensuring not to overcrowd the pan; work in batches if necessary. Sear the chicken for about 4-5 minutes per side‚ until golden brown and cooked through.
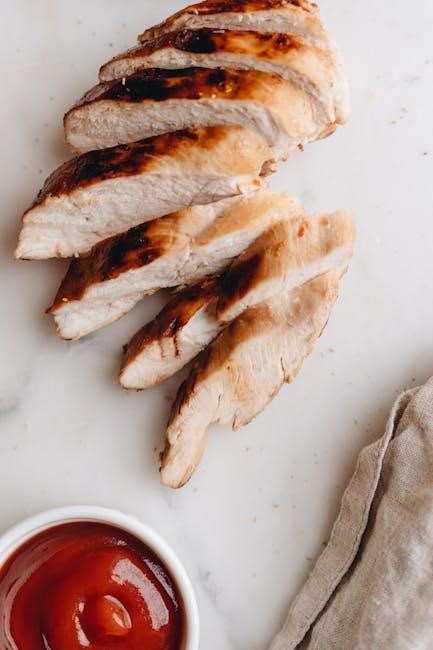
A key tip is to avoid moving the chicken around too much while it’s searing – allow it to develop a nice crust. Use a meat thermometer to confirm the internal temperature reaches 165°F (74°C). Remove the chicken from the skillet and set aside‚ ready to be combined with the luscious Alfredo sauce.
Oven Baking the Chicken (Alternative Method)
If you prefer a hands-off approach‚ or desire a more evenly cooked chicken‚ oven baking is a fantastic alternative. Preheat your oven to 375°F (190°C). Lightly grease a baking dish with cooking spray or olive oil. Arrange the thawed chicken pieces in a single layer within the prepared dish.
Drizzle the chicken with a tablespoon of olive oil and season lightly with salt‚ pepper‚ and any desired herbs – Italian seasoning works wonderfully. Bake for approximately 20-25 minutes‚ or until the chicken is cooked through and reaches an internal temperature of 165°F (74°C).
For extra flavor‚ you can broil the chicken for the last 2-3 minutes‚ watching carefully to prevent burning. This method yields tender‚ juicy chicken perfect for complementing the creamy Alfredo sauce.
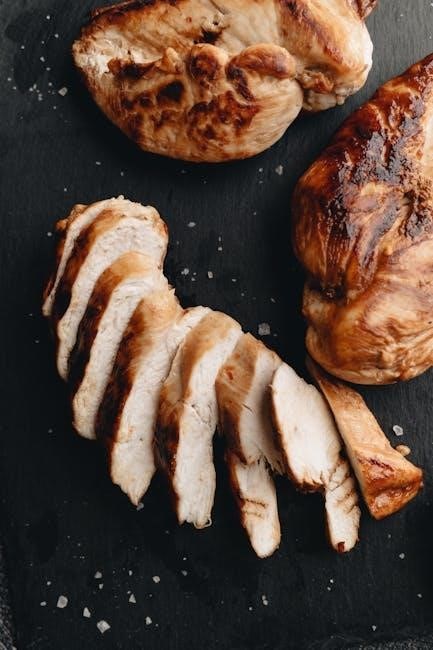
Ensuring Chicken is Cooked Through (Temperature Check)
Food safety is paramount! Never assume chicken is cooked based solely on appearance. The only reliable way to ensure doneness is by using a meat thermometer. Insert the thermometer into the thickest part of a chicken piece‚ avoiding bone. The internal temperature must reach 165°F (74°C) to eliminate harmful bacteria.
Check multiple pieces to guarantee even cooking. If the chicken hasn’t reached 165°F‚ continue cooking – whether pan-frying or baking – and recheck every few minutes. Undercooked chicken poses a health risk‚ while overcooked chicken becomes dry and tough.
A properly cooked chicken will be opaque throughout‚ with juices running clear‚ but always confirm with a thermometer for peace of mind and a delicious‚ safe meal.

Combining & Finishing the Dish
Now‚ the magic happens! Perfectly cooked pasta‚ tender chicken‚ and creamy Alfredo sauce unite for a comforting‚ flavorful experience – enjoy this masterpiece!
Adding Chicken to the Alfredo Sauce
Gently incorporate the cooked chicken into the warm Alfredo sauce‚ ensuring each piece is generously coated in the creamy goodness. Avoid overcrowding the pan; work in batches if necessary to maintain an even coating and prevent the sauce from cooling down too quickly.
The goal is to allow the chicken to absorb the flavors of the sauce‚ creating a harmonious blend of textures and tastes. Stir frequently‚ but delicately‚ to avoid shredding the chicken.
Allow the chicken to simmer in the sauce for approximately 5-7 minutes‚ allowing the flavors to meld together beautifully. This step is crucial for achieving that authentic‚ restaurant-quality taste. Remember to keep the heat on low to medium-low to prevent burning or scorching the sauce.
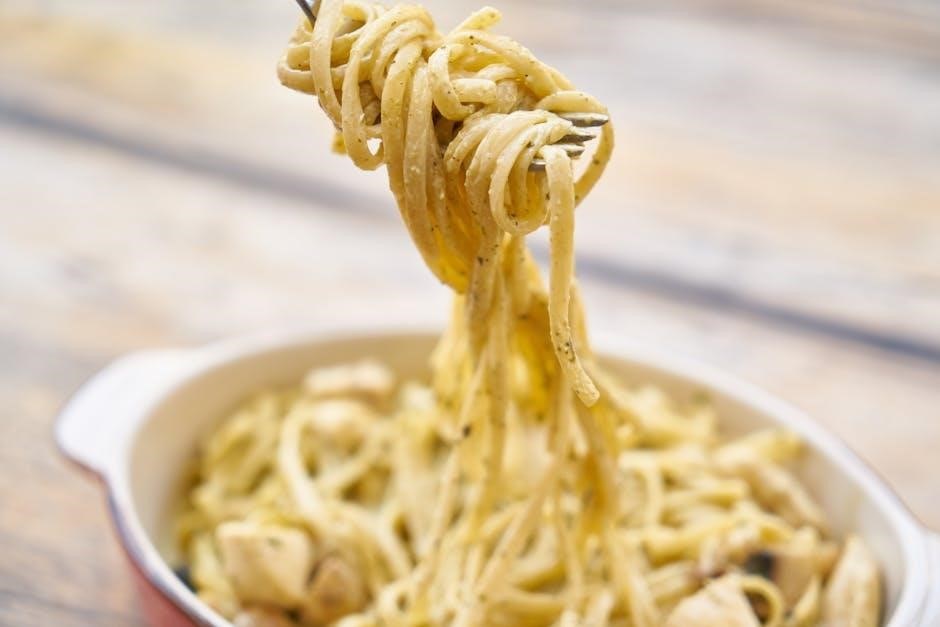
Cooking the Pasta (Timing is Key)
Bring a large pot of salted water to a rolling boil – generous salting is essential for flavorful pasta! Add the pasta (typically fettuccine) and cook according to package directions‚ but reduce the cooking time by 1-2 minutes. We want it al dente‚ as it will continue to cook slightly when combined with the hot sauce.
Proper timing is paramount. Begin cooking the pasta approximately 10-12 minutes before you anticipate finishing the sauce and chicken. This ensures everything comes together at the optimal temperature and texture.
Before draining‚ reserve about 1 cup of pasta water – this starchy liquid is liquid gold! It will help emulsify the sauce and create a beautifully creamy consistency when combined with the pasta.
Combining Pasta‚ Sauce & Chicken
With the pasta cooked al dente and drained (reserving that precious pasta water!)‚ it’s time to unite all the elements. Add the drained pasta directly to the pan containing the heated Alfredo sauce and cooked chicken.
Gently toss everything together‚ ensuring the pasta is thoroughly coated in the creamy sauce. If the sauce seems too thick‚ gradually add the reserved pasta water‚ a tablespoon at a time‚ while continuing to toss. The starch in the water will bind the sauce and create a luscious‚ velvety texture.
Continue tossing for 1-2 minutes‚ allowing the pasta to absorb some of the sauce and the flavors to meld beautifully. Serve immediately for the best experience!
Serving & Garnishing
Present your Costco Chicken Alfredo with flair! A generous portion‚ fresh garnishes‚ and complementary sides elevate this comforting dish to a memorable experience.
Plating Suggestions
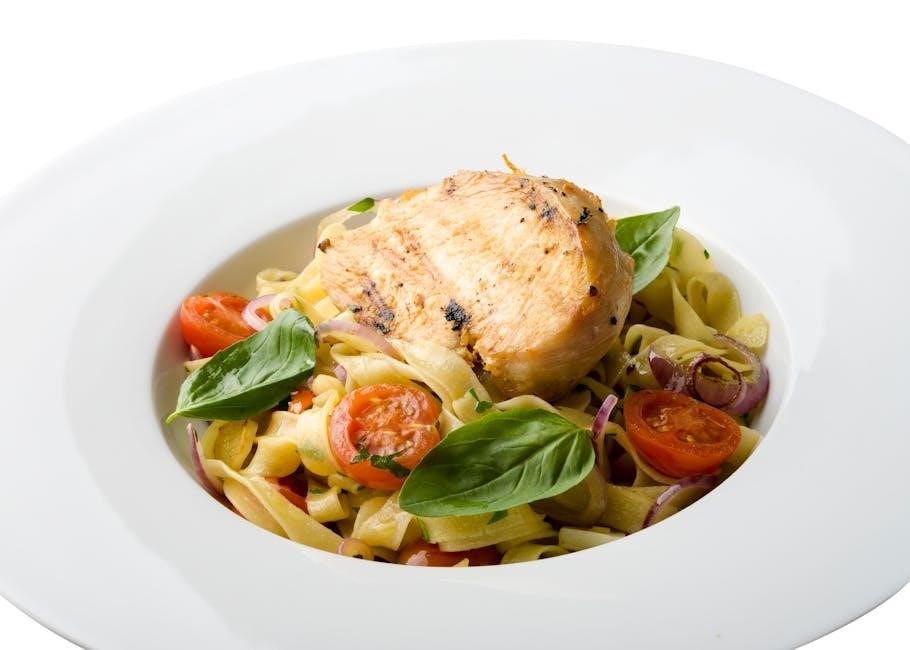
For an elegant presentation‚ consider individual shallow bowls rather than deep plates. This allows the creamy Alfredo sauce to beautifully showcase the chicken and pasta. A swirl of sauce on the bottom of the bowl before adding the pasta creates a visually appealing base.
Arrange the fettuccine artfully‚ perhaps twirling it with tongs to create height. Place the sliced chicken breast atop the pasta‚ slightly overlapping for a generous look. Don’t overcrowd the plate; leaving some negative space enhances the overall aesthetic.
Garnishing is key! A sprinkle of freshly chopped parsley adds a vibrant pop of color and freshness. A light dusting of grated Parmesan cheese completes the look‚ adding texture and flavor. For a more rustic presentation‚ serve family-style in a large serving dish‚ allowing everyone to help themselves. Remember‚ presentation enhances the dining experience!
Recommended Garnishes (Parsley‚ Parmesan)
Freshly chopped parsley is an absolute must-have for brightening both the appearance and flavor profile of Costco’s Chicken Alfredo. Its vibrant green hue provides a beautiful contrast to the creamy white sauce‚ and its subtle peppery notes cut through the richness. Flat-leaf (Italian) parsley is preferred for its superior flavor and texture.
Parmesan cheese‚ of course‚ is the classic accompaniment to Alfredo. Use freshly grated Parmesan for the best results – pre-grated cheese often lacks the same intensity of flavor. A generous dusting over the finished dish adds a salty‚ umami kick and a delightful textural element.
Consider a combination of both! A sprinkle of parsley followed by a snowfall of Parmesan creates a visually appealing and flavorful finish. You can also offer extra Parmesan at the table for those who prefer a more pronounced cheesy taste.
Side Dish Pairings
Given the richness of Costco’s Chicken Alfredo‚ lighter side dishes work best to create a balanced meal. A simple green salad with a vinaigrette dressing provides a refreshing counterpoint‚ cleansing the palate between bites. Consider a mix of spring greens‚ cherry tomatoes‚ and cucumber.
Steamed or roasted broccoli is another excellent choice‚ offering a healthy dose of vitamins and a slightly bitter flavor that complements the creamy sauce. Garlic roasted asparagus also pairs wonderfully‚ adding a sophisticated touch.
For a heartier option‚ consider garlic bread – but be mindful of adding too much richness! A crusty Italian bread‚ lightly toasted‚ is a simpler alternative. Finally‚ a side of fruit‚ like sliced oranges or a mixed berry salad‚ offers a sweet and refreshing finish.
Variations & Customizations
Elevate your Costco Chicken Alfredo! Explore exciting additions – vegetables‚ spices‚ or lighter options – to personalize this convenient and delicious meal.
Adding Vegetables (Broccoli‚ Spinach)
Boost the nutritional value and flavor profile of your Costco Chicken Alfredo by incorporating fresh or frozen vegetables. Broccoli florets and spinach are excellent choices‚ complementing the creamy sauce beautifully. For broccoli‚ consider steaming or roasting it until tender-crisp before adding it to the Alfredo during the final few minutes of cooking – this prevents it from becoming mushy. Alternatively‚ frozen broccoli can be added directly to the sauce during the last 5-7 minutes.
Spinach wilts quickly‚ so add it right before serving. A generous handful stirred into the hot Alfredo will wilt instantly‚ providing a vibrant green color and subtle earthy flavor. You can also sauté spinach separately with a touch of garlic for enhanced taste. Don’t be afraid to experiment with other vegetables like mushrooms‚ bell peppers‚ or asparagus – the possibilities are endless! Remember to adjust cooking times accordingly to ensure vegetables are cooked to your desired tenderness.
Spice it Up! (Red Pepper Flakes‚ Garlic)
Elevate the flavor of your Costco Chicken Alfredo with a touch of heat and aromatic garlic! A pinch of red pepper flakes adds a subtle kick that cuts through the richness of the sauce‚ creating a more dynamic taste experience. Start with ¼ teaspoon and adjust to your preference. For a more pronounced garlic flavor‚ sauté 1-2 cloves of minced garlic in a little olive oil before adding the Alfredo sauce – this blooms the garlic and releases its fragrant oils.
Alternatively‚ you can add garlic powder directly to the sauce‚ but fresh garlic provides a superior flavor. Consider using roasted garlic for a sweeter‚ more mellow garlic taste. A dash of black pepper can also enhance the spice profile. Be mindful not to overpower the delicate Alfredo sauce; the goal is to complement‚ not dominate‚ the existing flavors. Experiment to find your perfect level of spice!
Making it Lighter (Reduced Fat Options)
Enjoy the creamy goodness of Costco Chicken Alfredo with a few smart swaps to reduce the fat content! Substitute half-and-half for some of the heavy cream in the sauce – this significantly lowers the calorie count without sacrificing too much richness. Using whole wheat pasta instead of traditional pasta adds fiber and nutrients.
Increase the vegetable content by adding broccoli‚ spinach‚ or mushrooms; these bulk up the dish and provide essential vitamins. When cooking the chicken‚ opt for baking or grilling instead of pan-frying to minimize added fats. A sprinkle of Parmesan cheese provides flavor without needing a heavy-handed pour. Remember‚ moderation is key – small changes can make a big difference in creating a healthier‚ yet still delicious‚ meal!
Storage & Reheating
Proper storage maintains freshness‚ while gentle reheating preserves the creamy texture and delicious flavors of your Costco Chicken Alfredo masterpiece.
Storing Leftovers Properly
To ensure your leftover Costco Chicken Alfredo remains safe and delicious‚ prompt and proper storage is crucial. Allow the dish to cool completely – approximately 30-60 minutes – before transferring it to airtight containers. Divide larger portions into smaller containers for quicker reheating and to prevent bacterial growth.
Refrigerate immediately after cooling; Chicken Alfredo will keep well in the refrigerator for up to 3-4 days. Pay attention to any changes in smell‚ texture‚ or appearance‚ which could indicate spoilage.
For optimal freshness‚ use shallow containers‚ as they allow for faster and more even cooling. Avoid leaving the Alfredo at room temperature for extended periods‚ as this can encourage bacterial proliferation. Properly stored leftovers will provide a convenient and tasty meal later!
Reheating Instructions (Maintaining Quality)
Reheating Costco Chicken Alfredo requires a gentle approach to preserve its creamy texture and prevent the sauce from separating. The stovetop is the preferred method. Add a splash of milk or cream (about 1-2 tablespoons per serving) to the Alfredo before reheating to help maintain moisture.
Heat over low to medium-low heat‚ stirring frequently‚ until heated through – approximately 5-7 minutes. Avoid boiling‚ as this can cause the sauce to break. Alternatively‚ you can reheat in the microwave‚ using 30-second intervals‚ stirring between each interval‚ but this may affect the sauce’s consistency.
Ensure the chicken is heated to an internal temperature of 165°F (74°C). Reheating properly will restore the dish to a satisfying and enjoyable meal!
Freezing for Later (Is it Recommended?)
Freezing Costco Chicken Alfredo is not strongly recommended‚ as the sauce’s texture can significantly degrade upon thawing. The dairy-based Alfredo sauce tends to separate and become grainy when frozen‚ impacting the overall quality of the dish. However‚ if you must freeze it‚ do so immediately after preparation‚ allowing it to cool completely first.
Store in an airtight‚ freezer-safe container‚ leaving minimal headspace. It’s best consumed within one month for optimal‚ though compromised‚ quality. Thaw overnight in the refrigerator before reheating. Be prepared for a potentially less creamy and slightly separated sauce. The chicken itself freezes better than the sauce.
Consider freezing only the chicken separately for future use in other meals.